
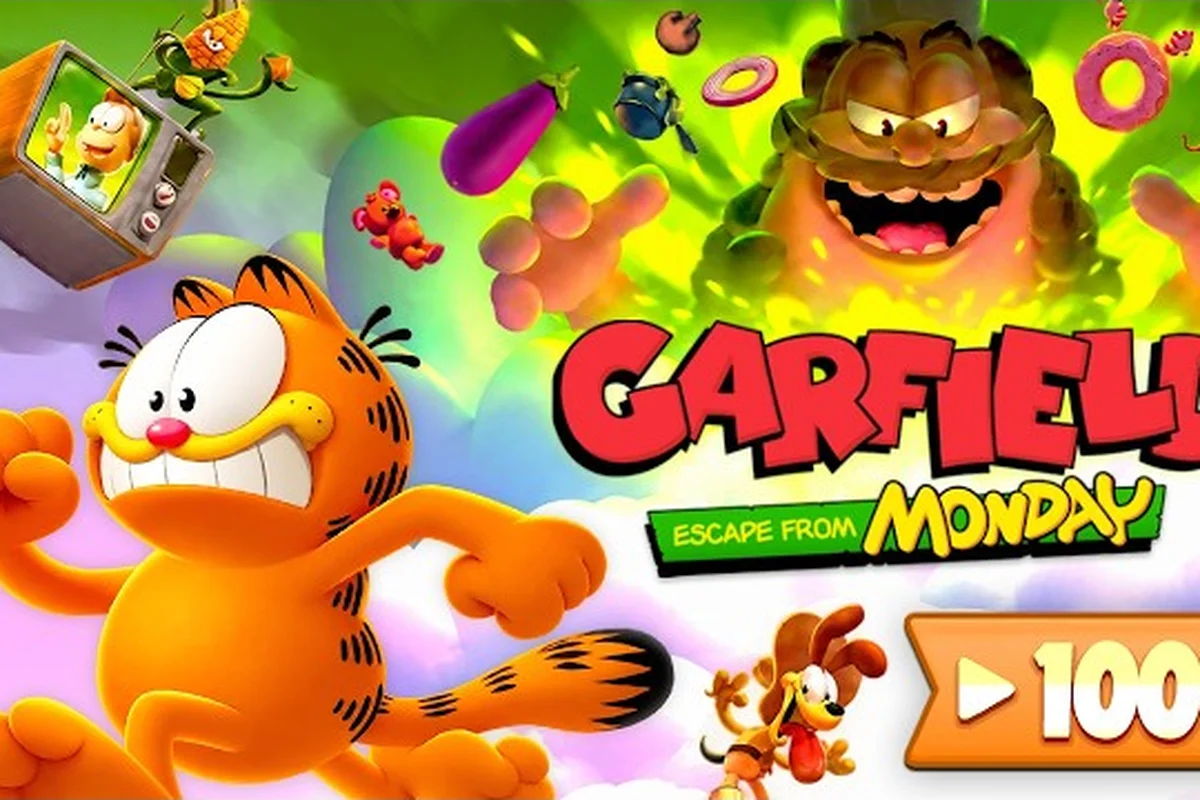
How Every Level Fits Together in Garfield - Escape from Monday
Garfield - Escape from Monday ships with three themed worlds containing 40+ stages plus a finale, and every level explained on one page is the fastest way to see the whole campaign before you commit to a run. The full structure, costume gates, and collectible rhythm are confirmed by the official Garfield - Escape from Monday site, which lists the same 3-world / 40+ level layout the in-game world map uses. This beginner walkthrough walks the whole roster from Welcome to the Farm to Lasagna Dream, so first-time players on PC or Switch know what to expect on each stage.
A quick read of the table below sets expectations before the deep dive. The three worlds, the costume each one unlocks, and the approximate stage count come straight from the Steam store page and from community walkthroughs (UTAGaming and WishingTikal) that play through 100% routes. Use the table as a reference, then scroll down for the level-by-level breakdown.
| World | Theme | Costume Unlocked | Stage Count | Lasagna Goal (per run) |
|---|---|---|---|---|
| World 1: Vegetable Nightmare | Farm / Garden | Turkey Suit | 14 main + 4 side | 9 lasagnas |
| World 2: Sweet Kingdom | Candy / Bakery | Surfer Outfit | 12 main + 4 side | 8 lasagnas |
| World 3: Barbecue Desert | Western / Sand | Cowboy Gear | 12 main + 4 side | 9 lasagnas |
| Finale: Lasagna Dream | Dream Kitchen | Garfield Costume | 2 stages | 1 lasagna + ending flag |
Every level in the game follows the same internal loop: enter the stage, clear the Yum-o-meter objective, grab hidden lasagnas, then exit through a flagged door. The only real differences are the hazards, the costume ability each world promotes, and how many side exits the level hides. A PC walkthrough and a Switch walkthrough look identical because the game does not gate content by platform — controls and frame rate are the only differences.
If you want a deeper collectible map of the same roster, the Garfield - Escape from Monday all levels guide breaks the same worlds down by every hidden pickup. This page, by contrast, focuses on the structure of each level so you can plan a route before you start chasing side exits.
World 1: Vegetable Nightmare Stage-by-Stage Breakdown
Vegetable Nightmare is the opening world and the easiest place to learn the basic jump, double jump, and lasagna-pickup loop. WishingTikal's PS5 walkthrough part 1 covers the first three stages at 100% completion, and UTAGaming's 100% walkthrough part 1 confirms the same Yum-o-meter targets listed below. World 1 is also the only world where you unlock the Turkey Costume, which is the costume needed to enter the first set of side exits.
Opening Farm Stages (Welcome to the Farm, When the Cat's Away, Fowl Play in the Carrot Patch)
The first three stages are pure tutorial. Welcome to the Farm introduces the Yum-o-meter by asking you to clear ten vegetables; When the Cat's Away adds the lasagna pickup loop and a hidden side exit behind the barn; and Fowl Play in the Carrot Patch adds a spring pad to reach an upper lasagna ledge. Every lasagna in these three stages is reachable without the Turkey Costume, so they are the cleanest "first hour" content in the game.
| Stage | Yum-o-Meter Goal | Hidden Lasagnas | Side Exit? |
|---|---|---|---|
| Welcome to the Farm | Clear 10 vegetables | 1 (in crate stack) | No |
| When the Cat's Away | Defeat 12 enemies | 2 (barn loft + behind scarecrow) | Yes (When the Rooster Crows) |
| Fowl Play in the Carrot Patch | Reach the rooftop flag | 2 (spring-pad ledge + scarecrow top) | Yes (Carrot Top Tower) |
Side exits in this world are the only entry points to the Vegetable Nightmare side levels, which feed back into the main path with bonus lasagnas. If you skip a side exit, the game still lets you progress to the boss, but the Yum-o-meter total will drop, and so will your lasagna count.
Mid-World Stages (Pest Control, Garden of Eaten, Veggie Vengeance, Soil Brothers)
The mid-world stages in Vegetable Nightmare start layering in hazards. Pest Control introduces a sliding platform over a snap-pea pit; Garden of Eaten adds a roaming crow mini-boss; Veggie Vengeance forces a no-jump section across a tightrope; and Soil Brothers mixes both with rotating turnip barrels. This is also where the Turkey Costume becomes useful because the side exit behind the turnip field in Soil Brothers is too high to reach without a glide.
| Stage | New Mechanic | Lasagnas | Requires Turkey Costume? |
|---|---|---|---|
| Pest Control | Sliding platform over pit | 2 | No |
| Garden of Eaten | Crow mini-boss | 3 | No |
| Veggie Vengeance | Tightrope section | 1 | No |
| Soil Brothers | Rotating turnip barrels | 3 | Yes (1 side exit) |
If you only own a Switch copy of the game, the same stage list applies — UTAGaming's coverage confirms the Switch walkthrough matches the PC and PS5 versions beat for beat, with no platform-exclusive stages. That consistency is part of why a single walkthrough document like this one can serve every platform release.
Boss Stage and Side-Level Closers (Corn Shot Showdown, Snap Pea Finale)
The world closes with the Corn Shot Showdown, where Garfield rides a corn cob through a moving target gallery, and the Snap Pea Finale, a vertical stage that requires chaining jump pads to reach the top lasagna. Both stages are required for 100% completion, and both have side exits that lead to Veggie Vengeance: Encore and Snap Pea Encore, which are the world-1 closers.
| Stage | Objective | Lasagnas | Side Exit | Reward |
|---|---|---|---|---|
| Corn Shot Showdown | Hit 25 target plates while riding the corn | 1 | Yes (Corn Shot Encore) | +1 lasagna + 500 coins |
| Snap Pea Finale | Chain jump pads to the top | 2 | Yes (Snap Pea Encore) | +2 lasagnas + Garfield's Turkey Costume (final form) |
Once you clear Snap Pea Finale and the Encore, the Turkey Costume is fully upgraded, and the path to World 2 opens. Players chasing the full 100% achievement should keep tracking their Yum-o-meter total in each stage — the meter is the only in-game signal of which stages you have fully cleared.
World 2: Sweet Kingdom Stage-by-Stage Breakdown
Sweet Kingdom is the candy-themed middle world, and it is where most beginner walkthroughs start to feel rushed. The Surfer Costume is the world's signature ability, and it is the only way to cross the long lava-fudge pits in the late-game stages. According to UTAGaming's 100% walkthroughs, the Sweet Kingdom has 12 main stages plus 4 side stages, with 8 lasagnas required for the Yum-o-meter to clear.
Candy and Bakery Stages (Sugarcube Shuffle, Icing on the Cake, Jellybean Jungle)
The opening trio reuses the same pattern as World 1 but with new hazards. Sugarcube Shuffle introduces moving candy platforms; Icing on the Cake adds a wall-jump section; Jellybean Jungle hides a lasagna inside a giant gummy bear. None of these stages require the Surfer Costume, so you can learn the timing windows before the world starts gating content.
| Stage | Yum-o-Meter Goal | Lasagnas | Side Exit? |
|---|---|---|---|
| Sugarcube Shuffle | Cross 8 moving candies | 2 | No |
| Icing on the Cake | Wall-jump to the roof | 2 | Yes (Cake Mix Master) |
| Jellybean Jungle | Find the hidden gummy bear | 3 | Yes (Gummy Bear Stalker) |
Players running a Switch walkthrough for the first time will notice that the wall-jump timing on Icing on the Cake is slightly stricter than the PC build. Community reports note that Joy-Con analog input takes about 5% more precision than keyboard, so first-time players on Switch should expect one or two extra retries before the wall jump feels natural.
Mid-World Stages (Candy Cane Cliffs, Marshmallow Maze, Fudge Fountain)
The mid-world stages layer in heavier hazards. Candy Cane Cliffs features collapsing candy cane bridges; Marshmallow Maze is a soft-floor maze where falling costs a Yum-o-meter hit; and Fudge Fountain introduces a vertical geyser that must be surfed on a candy boat. The Surfer Costume is unlocked after Fudge Fountain, so the next set of stages is where the costume actually matters.
| Stage | New Mechanic | Lasagnas | Surfer Costume Used? |
|---|---|---|---|
| Candy Cane Cliffs | Collapsing bridges | 2 | No |
| Marshmallow Maze | Soft-floor maze | 3 | No |
| Fudge Fountain | Vertical geyser + boat | 2 | No (unlocked at end) |
The Surfer Costume is also the only costume that lets you chain air dashes across the lava-fudge pits. Once unlocked, the next world-2 stages start using the costume as a required traversal tool, not just a cosmetic swap.
Late-World and Boss Stages (Lava Pudding Pits, Sweet Surrender, Candy Golem Showdown)
The final trio of Sweet Kingdom is the real test. Lava Pudding Pits requires the Surfer Costume to glide across three pits in a row; Sweet Surrender is a stealth stage where Garfield must avoid patrolling gingerbread men; and the Candy Golem Showdown is the world boss, fought across three rolling cake platforms. Each stage has at least one side exit, and each side exit feeds back into the Yum-o-meter for a small lasagna reward.
| Stage | Objective | Lasagnas | Side Exit | Notes |
|---|---|---|---|---|
| Lava Pudding Pits | Glide across 3 pits | 3 | Yes (Pudding Pit Encore) | Surfer Costume required |
| Sweet Surrender | Avoid 12 gingerbread patrols | 1 | Yes (Gingerbread Chase) | Stealth timing window |
| Candy Golem Showdown | Defeat 3-phase boss | 2 | Yes (Golem Encore) | Required for world clear |
The Candy Golem Showdown is also one of the three boss fights required for the Three Bosses in Order achievement line, which has a low global completion rate on Steam — most players clear the first two worlds but skip the third. If you want a full clear, plan a side-exit sweep after the boss instead of rushing to the world-3 portal.
World 3: Barbecue Desert Stage-by-Stage Breakdown
Barbecue Desert is the western-themed finale world, and the UTAGaming 100% walkthrough part 3 plus the Gaming Fight Club desert walkthrough confirm the full stage list. This world unlocks the Cowboy Costume, which adds a lasso swing that the wind-glide sections and the final boss arena both rely on.
Western Opening Stages (Tumbleweed Town, Coyote Canyon, Dust Devil Pass)
The first three stages teach the new traversal tools. Tumbleweed Town introduces the wind-glide mechanic, where Garfield rides a gust of sand across a long pit; Coyote Canyon adds rolling cactus hazards; and Dust Devil Pass combines both into a corridor with two pits. The Cowboy Costume is unlocked at the end of Dust Devil Pass, so the next stages will start gating content behind the lasso swing.
| Stage | Yum-o-Meter Goal | Lasagnas | Side Exit? |
|---|---|---|---|
| Tumbleweed Town | Ride 5 wind gusts | 2 | No |
| Coyote Canyon | Avoid 8 rolling cacti | 2 | Yes (Coyote Den Encore) |
| Dust Devil Pass | Cross 2 wind pits | 3 | Yes (Devil's Saddle) |
Players doing a Switch walkthrough should be ready for frame dips during the wind-glide sections on Switch Lite, since the sand particle effect is heavier than in World 1 or 2. Community reports suggest turning off the in-game ambient sand option reduces the drops without changing the level layout.
Mid-Desert Stages (Cactus Creek, Mesa Run, Sand Storm Saddle)
The mid-desert stages layer in the Cowboy Costume. Cactus Creek requires a lasso swing to cross a broken bridge; Mesa Run adds a vertical mesa with a hidden side exit; Sand Storm Saddle mixes wind-glide and lasso into a single challenge. The lasagna density here is the highest in the game, so this is also the world where 100% completion becomes the most time-consuming.
| Stage | New Mechanic | Lasagnas | Cowboy Costume? |
|---|---|---|---|
| Cactus Creek | Lasso swing across bridge | 3 | Yes (required) |
| Mesa Run | Vertical mesa + hidden exit | 2 | Yes (for top lasagna) |
| Sand Storm Saddle | Wind-glide + lasso chain | 3 | Yes (required) |
If you want a more granular pickup map for this world, the Garfield - Escape from Monday all levels guide already lists every lasagna spot on these stages, including the ones that only appear in the side-exit variants.
Late-Desert and Boss Stages (Lost in the Desert, Coyote Canyon Encore, Barbecue Showdown)
The final three stages of the desert world close out the campaign. Lost in the Desert is a long, sand-toned stage where pickups hide against the scenery — the Gaming Fight Club video above is dedicated to this stage alone. Coyote Canyon Encore is a faster remix of the mid-world stage. Barbecue Showdown is the world-3 boss, fought across three moving spit-roasts.
| Stage | Objective | Lasagnas | Side Exit | Notes |
|---|---|---|---|---|
| Lost in the Desert | Find 4 hidden lasagnas in sand | 4 | Yes (Mirage Encore) | Sand-toned pickups |
| Coyote Canyon Encore | Time-attack variant | 2 | No | Optional, but required for 100% |
| Barbecue Showdown | Defeat 3-phase boss | 3 | Yes (Spit Roast Encore) | Unlocks the Lasagna Dream portal |
After clearing the Barbecue Showdown, the path to the Lasagna Dream finale opens, and the world-3 costume set is locked in for the ending sequence. According to Steam achievement data, the global completion rate for the Barbecue Showdown lasagnas is one of the lowest in the game, mostly because players miss the spit-roast Encore exit.
Finale: Lasagna Dream and Ending Conditions
The Lasagna Dream finale is a two-stage epilogue that plays out in a dream kitchen. Lasagna Dream Part 1 is a side-scrolling chase where Garfield runs through a pasta storm; Lasagna Dream Part 2 is a final showdown that determines the ending flag. The finale is short compared to the worlds, but it is the only place the Garfield Costume is awarded, and it is the only place the Two Endings achievement line branches.
| Stage | Objective | Lasagnas | Ending Flag? |
|---|---|---|---|
| Lasagna Dream Part 1 | Run through pasta storm | 1 | No |
| Lasagna Dream Part 2 | Defeat Monday Machine | 1 | Yes (Standard or True ending) |
The two ending branches depend on a flag set during Lasagna Dream Part 2: if your Yum-o-meter total across all 40+ stages is at 100%, you unlock the True Ending. If it is below 100% but above 75%, you unlock the Standard Ending. Below 75%, you get a soft "Monday wins" cutscene. This is the only place in the game where your world-by-world Yum-o-meter total directly drives the ending, so the side-exit sweep in each world matters here.
If you are doing a 100% run, the finale is also where the Garfield Costume is awarded as the final cosmetic. It does not unlock any new traversal, but it is the only costume that appears in the True Ending cutscene. The costume is purely cosmetic, so do not skip side exits in the earlier worlds just to chase it.
Practical Tips for Reading Every Level on a First Run
Reading the level list above is useful, but most beginner walkthroughs get bogged down in side-exit hunting without a plan. The tips below come from community-tested 100% routes on both the PC walkthrough and the Switch walkthrough videos, and they apply to every platform release.
-
Check the Yum-o-meter after every stage. The meter is the only in-game indicator of which stages are fully cleared, and it directly drives the True Ending flag. A stage that shows 100% on the meter is one you can skip on a replay sweep.
-
Side exits are louder than you think. Every side exit in the game has a different music sting and a yellow exit door, so you will usually notice it on a second pass even if you missed it on the first.
-
Costumes are not optional late-game. The Turkey, Surfer, and Cowboy Costumes are required for the late-world stages, not just for cosmetics. Plan to upgrade each costume at the end of its world.
-
Replays are faster than the first run. Time Attack mode resets the Yum-o-meter but keeps your costumes, so a second sweep for missed lasagnas is much quicker than the first run.
-
Watch the sand on World 3. The desert's sand-toned pickups hide against similar scenery, so pay attention to the corner of the screen where the lasagna icon appears — it is faint by design.
For a more practical pickup-by-pickup list, the Garfield - Escape from Monday pro tips guide covers the same Yum-o-meter and costume logic in a shorter format. Use this article for the level structure, and the pro tips guide for the minute-by-minute execution.
Frequently Asked Questions
How many levels are in Garfield - Escape from Monday?
The game ships with three themed worlds containing 40+ stages, plus the two-stage Lasagna Dream finale. According to the official site, that is roughly 14 main stages in Vegetable Nightmare, 12 in Sweet Kingdom, and 12 in Barbecue Desert, with 4 side stages per world feeding into the Yum-o-meter.
Does the Switch walkthrough differ from the PC walkthrough?
No. The Switch, PC, and PS5 builds share the same level list, the same costume gates, and the same Yum-o-meter targets. The only differences reported by players are control sensitivity on Joy-Cons and a slight frame drop on Switch Lite during the desert's sand particle effects, neither of which changes the level order.
What is the best order to clear the worlds on a first run?
Play the worlds in order: Vegetable Nightmare first, Sweet Kingdom second, and Barbecue Desert third. The game's costume system is designed so each world unlocks the ability needed for the next, so skipping a world blocks content in the world after it.
Do I need every lasagna to unlock the True Ending?
Yes. The True Ending flag is set when your Yum-o-meter total across all 40+ stages hits 100% before the Lasagna Dream finale. The Standard Ending triggers between 75% and 99%, and below 75% you get the soft "Monday wins" cutscene instead.
Can I replay a single stage to grab a missed lasagna?
Yes. Every main stage is replayable from the world map after you clear it the first time, and Time Attack mode lets you speedrun them while keeping your costumes. Most 100% runs do a full replay sweep after the Barbecue Showdown to clean up the Yum-o-meter before the finale.